INTRODUCTION AND SUPPLIES
Boggled by filing? Overwhelmed by keeping your paper records and memories safe? After a lifetime of struggling, I came up with a solution that has worked for years.
When I say “lifetime,” I mean it. I read a dozen books on filing, and tried all kinds of methods, and none of them worked. It caused me a horrible amount of anguish and stress.
But three years ago when my professional organizer first looked at my filing system, she was extremely impressed. I’d finally found the answer.
And what I did wasn’t in any of the books. I came up with my own system, and it has simplified the filing process so much that I can truly keep my papers organized at last.
Is it perfect? Of course not. If I go a few months without tending to papers because of depression, finding recent material (like a property tax bill that is due NOW) becomes a major headache. But one beauty of the system is, you can catch up in a hurry once you’ve gathered those few months’ paperwork together again.
One key factor is that you have to have enough file space for what you need or want to keep. A front-facing 2-high file cabinet isn’t going to work if you have enough material for 6 drawers.
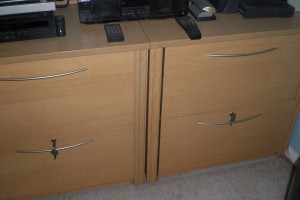
I keep a lot of stuff, so I have two 2-high double-wide lateral files along with two regular-sized file drawers in my desk. One entire lateral drawer is dedicated to my writing, so its only organization is by year and/or subject. (I won’t need to mention this drawer again.) Another is dedicated to manuals. That and the rest are what I’ll be talking about.
Once upon a time, though, I had three 2-highs, a 4-high, plus some metal file boxes. I had to keep a list on my computer of what was in which cabinet and drawer. These were beautiful pieces in cherry and walnut, and I hated to give them up when I moved, but using so many small cabinets for my filing system had gotten too complicated. After I moved I got all new matching office furniture, including the lateral files.
Don’t be intimidated by the length of this tutorial. I have gone into great detail, and it takes a long time to write it out but not a long time to do the work, especially if you already have things filed but just aren’t happy with how your filing system works for you, or don’t have huge stacks of unfiled material. (If you do, don’t stress yourself by trying to process everything at once. It isn’t necessary.)
What You Will Need:
- File Cabinet(s)
- Box-Bottom hanging files. I’ve found that 2” wide are the most useful for me, although it means some don’t have much in them and a few are too full. The best ones are from Smead:
Smead Box Bottom Hanging File Folders, 2″ Expansion, Letter Size, Standard Green, 25 per Box (64259)
- Manila folders with 1/3 cut tabs – again, Smead makes the best:
Smead Manila File Folder, 1/3-Cut Tab, Letter Size, Manila, 100 per Box (10330)
- Label maker (not essential, but it helps). This is the one I use. I’m very happy with it, and label tape refills are inexpensive:
- Paper clips
- Binder clips
- Sticky notes
- File sorter – I recommend you get a step-up/tiered sorter. Amazon has many available, so if you want something different or more decorative, search for “tiered file sorter.” Here’s an example:
Note: I am not affiliated with Smead, Dymo or Rubbermaid. I will earn a little bit of money from Amazon if you buy any materials through the links above and on other pages of this tutorial. (That would make me very happy, please consider it.)
![]()
Complete Tutorial:


